To customise a ship, you first have to load the ships data or xsp file into the ship creator, then select the "Customize Ship" option from.
This will open the customize ship dialog ready for you to make any changes to the ships that you wish.
First of all, you need to set the X3 Directory and the Base Language.
The X3 directory is where the program can find all the games data and language files. Once selected, you then choose which language from the list. The list display all languages of the standard text file for X3.
Once set, you can now make the required changes.
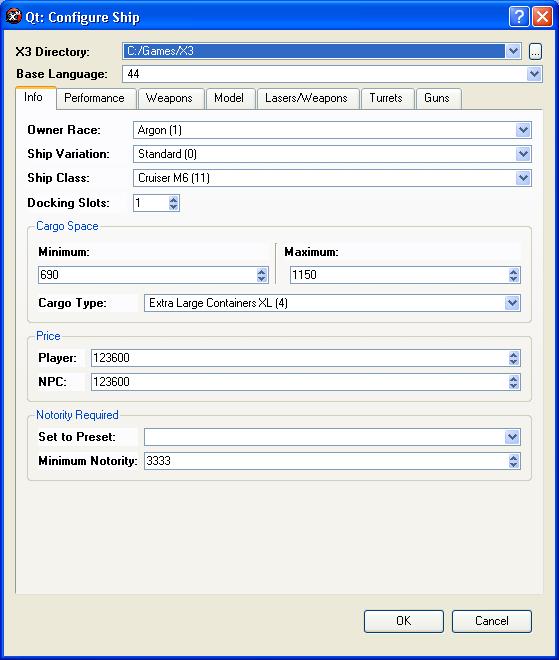
The info page has various different settings for the ship.
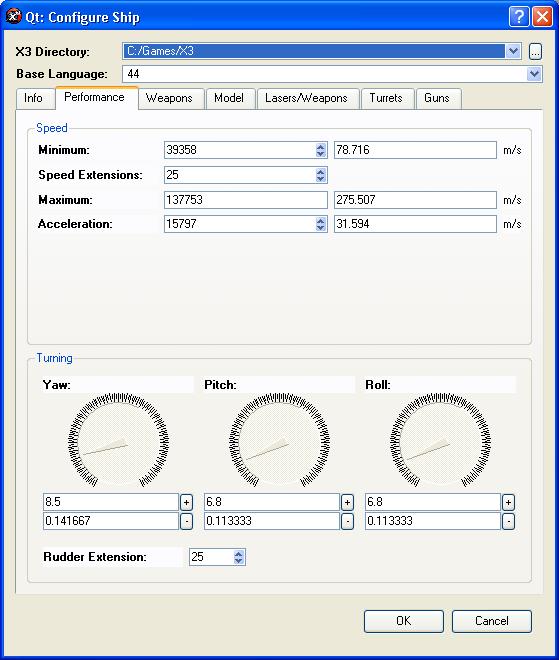
This is for the ships performance, like the speed and manovrability of the ship.
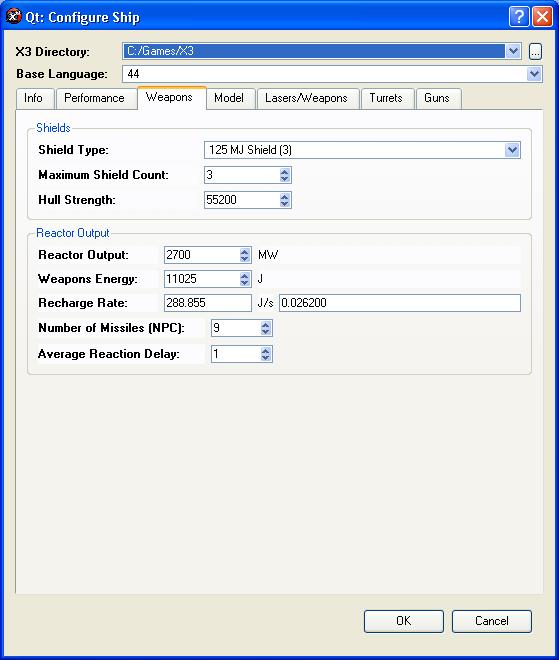
The Weapons tab has settings for the ships weapon capacity and shields.
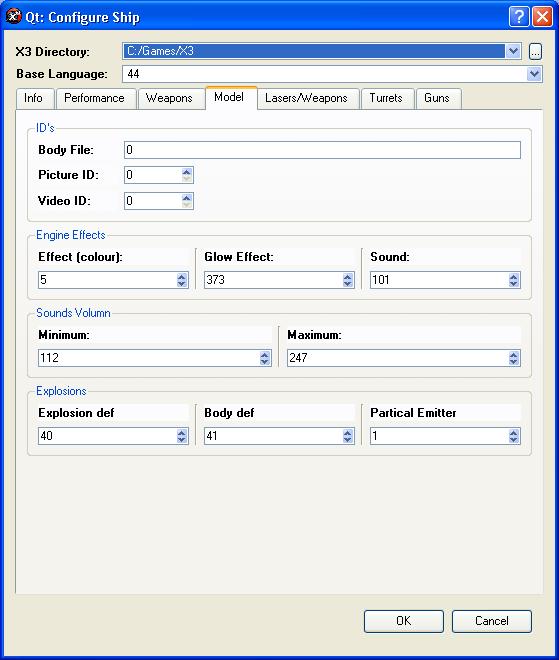
This includes various settings for the ships model and sounds. IE the different effect values and sound volomns.
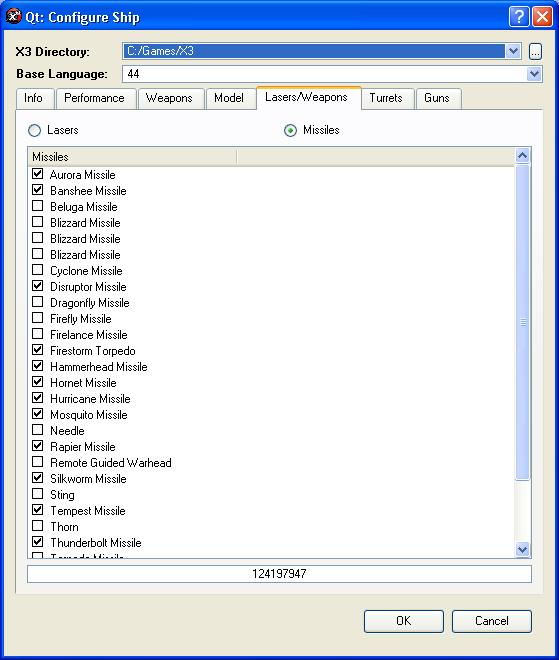
This allows you to set the lasers that can be mounted on the front of the ship as well as the missiles that are compatable.
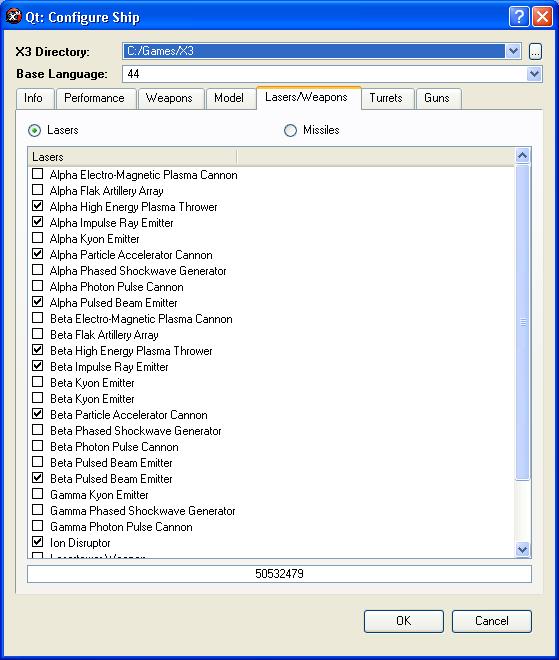
Selecting the Lasers or Missiles options changes the display between the available lasers and missiles.
In the List, each item has a check box, Check the weapons or missiles you wish mountable.
The bottom box display the mask for the installable weapons or missiles.
In the turrets tab, you can adjust the different turrets on the ship, changing thier weapons and scenes.
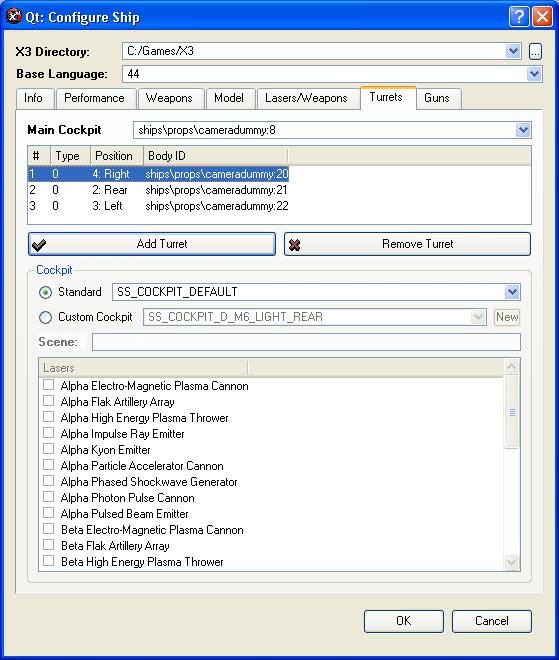
Main Cockpit: The main cockpit is the camera object for the main cockpit. This is the object in the scene file thats used to position the cockpit camera. If you have a scene file, it will list all available model entries and thier index.
The Next list is the available turrets, you can have upto 6 turrets on the ship, each with a different position, Front, Rear, Right, Left, Up and Down.
To add a new turret, click on the "Add Turret". You will then be asked to select the position, only the unsued positions will be displayed as you cant add 2 turrets with the same position. If you already have 5 turrets, it will add the last remaining position straight away without asking.
To change the Body ID for a turret, simply double click on the item in the list, and you will be asked to select a new object, This only works if you have a scene file available in the ship file.
To Remove a turret, highlight it in the list and click on the "Remove Turret" button.
When you select the turret, you can then adjust the cockpit type for that turret.
Either select Standard or custom Cockpit. Standard allows you to use one of the built in cockpits and you just select it from the List.
Custom Cockpit allows you to customise the cockpit for each turret, either select one of the available cockpits in the list, or click on the New button to add an new entries.
You also need to enter the scene for the cockpit, this is whats displayed as the cockpit when you in that turret.
Finally, you need to select the guns that are compatable with this cockpit, ie what guns that turret can use. All guns on the turret can use the same weapons.
The guns tab allows you to edit each gun entry for the turrets.
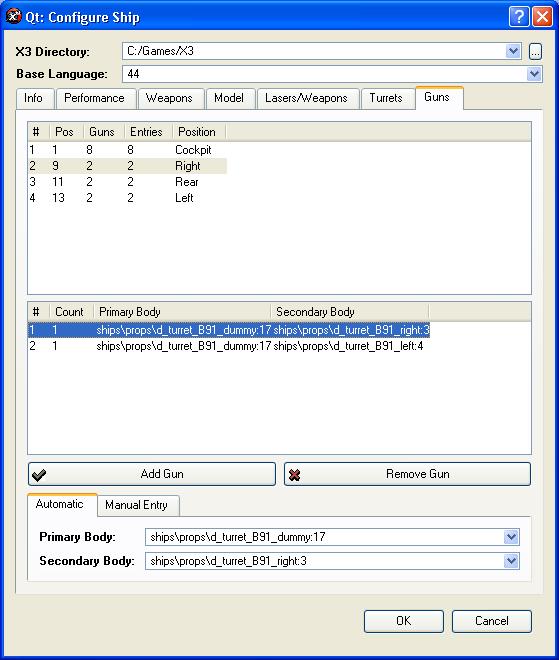
This first list are the available turrets, and how many guns are on each turret.
Selecting the turret entries will allow you to add and remove guns to that cockpit.
The first entries is the gun positions for the main cockpit, this also determines how many guns you can mount on the front.
The second list display all the available guns on the selected cockpit.
The primary body is the body reference from the main scene file, ie the weapons dummies to position the guns on the ship.
The secondary body is the body reference from the dummy entry for the primary body. IE some gun models could be made up of multiple guns, use the secondary body to select which one it should use. This is only avaialble if the dummy entry exists for the ship.
To add a gun, click on the "Add Gun" button, this will add an empty item to the list, then you need to configure it.
To remove a gun, select the gun to remove and click "Remove Gun".
To edit the gun entry, select the gun from the list, and use either Automatic or Manual Entry.
This reads the dummies and scene files to fine all avaialble positions, and allows you to simply choose the one thats required.

This allows you to enter the model and index manually.
Just fill in the boxes and click on the Update to update the entries